


 English
  Español
 русский
News
Content
- 1 The Fast Answer: How To Tarp A Roof Leak
- 2 Understanding Where the Leak Is Actually Coming From
- 3 What You Need Before Climbing Up
- 4 Step-By-Step Tarping Process
- 5 Adjusting the Approach for Different Roof Shapes
- 6 Mistakes That Undo a Tarp Job Overnight
- 7 Comparing Tarp Materials for Roof Coverage
- 8 Weather and Seasonal Considerations
- 9 Managing Interior Damage While the Tarp Is Up
- 10 Checking On a Tarp Over Time
- 11 When To Handle It Yourself and When To Call a Roofer
- 12 Frequently Asked Questions
- 12.1 How long can a tarp stay on a roof?
- 12.2 Do I need to remove damaged shingles before tarping?
- 12.3 Can I tarp a roof by myself?
- 12.4 What size tarp do I need for a roof leak?
- 12.5 Why does my tarp keep blowing off in wind?
- 12.6 Is a PVC Tarpaulin Cover reusable?
- 12.7 Can a tarp stop a roof leak completely?
- 12.8 What color tarp works best for a roof?
- 12.9 How do I know if my tarp is installed correctly?
- 12.10 Should I use rope in addition to battens?
- 12.11 Can I tarp over a skylight or chimney?
- 12.12 How soon after a storm should a roof be tarped?
- 12.13 What's the difference between a tarp and a roof membrane?
- 12.14 Will homeowners insurance cover the cost of a tarp?
The Fast Answer: How To Tarp A Roof Leak
To tarp a roof leak, measure the damaged area and add at least four feet of overhang on every side, then anchor a heavy-duty PVC Tarpaulin Cover over the ridge line so water sheds away from the hole rather than pooling on it. Wrap wooden battens (2x4 boards work well) around the tarp edges and screw them into the roof deck through the tarp material, spacing screws every 12 to 18 inches. Never nail directly through unsupported tarp fabric, since the material will tear loose within the first strong gust.
The tarp needs to extend past the ridge and down both slopes whenever the damage sits near the peak, because water traveling down one side of a roof will otherwise slip underneath the tarp from the opposite slope. A properly placed cover buys anywhere from a few weeks to several months of protection depending on the tarp's coating weight, UV exposure, and how well the batten frame resists wind uplift.
Everything past this point covers the details behind that summary: how to read the damage correctly, which tools actually matter, how to handle different roof shapes, and how to keep the cover intact through changing weather until permanent repairs can be scheduled.
Understanding Where the Leak Is Actually Coming From
Before any tarp goes up, it helps to know that the spot where water drips inside a house is rarely the exact spot where it entered the roof. Water travels along rafters, sheathing, and insulation before it finds a gap to fall through, sometimes moving several feet horizontally along the way. Tarping the wrong section leaves the real entry point exposed while the visible ceiling stain keeps growing underneath a cover that isn't doing anything useful.
Common Entry Points Worth Checking
- Missing, cracked, or lifted shingles, particularly after high wind events
- Flashing around chimneys, skylights, and vent pipes that has separated or corroded
- Valleys where two roof slopes meet, since these channel large volumes of water and wear faster than flat sections
- Clogged or damaged gutters that force water to back up under the roof edge
- Punctures from fallen branches or debris impact
- Nail pops, where a fastener backs out slightly and creates a small but steady drip path
Tracing the Path From the Attic
If the attic is accessible, checking it with a flashlight before climbing onto the roof gives a much clearer picture. Look for damp insulation, dark streaks along rafters, or daylight coming through small gaps. Since water tends to run downhill along the underside of the decking, the highest wet point in the attic is usually the closest indicator of where the true entry point sits on the roof surface above.
What You Need Before Climbing Up
A roof tarping job fails more often from missing hardware than from a bad tarp. Gather everything on the ground first, since trips up and down a ladder while a storm is still passing overhead are how most roof-related injuries happen.
Core Materials List
- A PVC Tarpaulin Cover sized at least 8 feet larger than the damaged area in both directions
- 2x4 lumber cut into battens, roughly 4 to 6 feet long depending on tarp width
- Exterior-grade screws, 3 inches long, not standard nails
- A cordless drill with a spare battery
- A stabilized extension ladder rated for the roof height, plus a roof anchor or harness for steep slopes
- A tape measure, chalk line, and utility knife
- Work gloves with grip texture, since wet tarp material becomes slippery within minutes
- Soft-soled, slip-resistant footwear rather than standard work boots
- A rope or tool belt to keep hardware within reach instead of carrying loose screws in a pocket
Why Tarp Material Choice Changes the Outcome
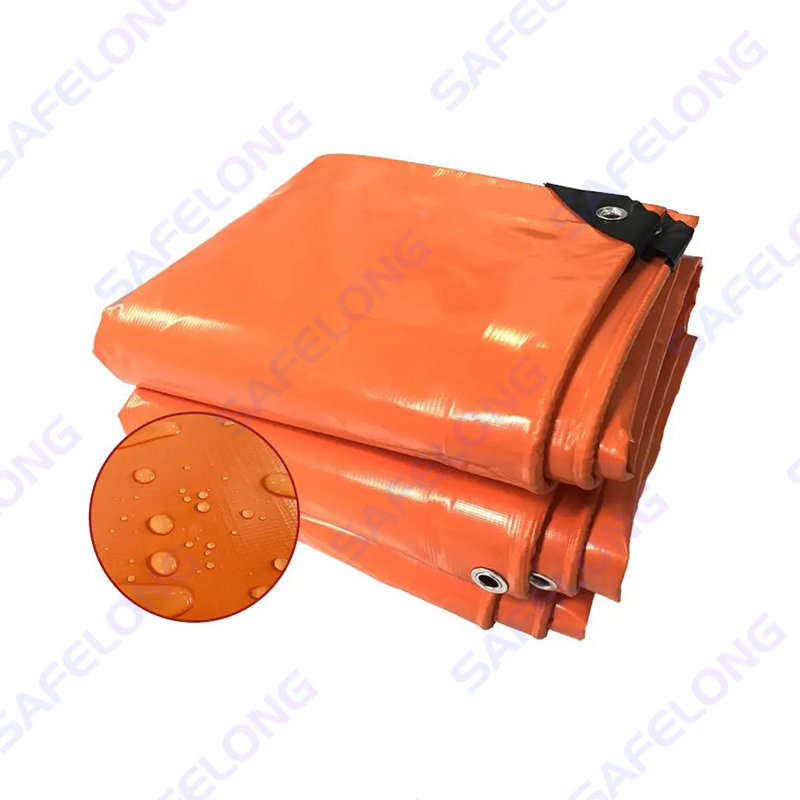
Standard poly tarps sold at general hardware counters are built for one-time or short-term use, and they degrade fast under direct sun. A PVC Tarpaulin Cover uses a woven polyester or nylon scrim coated on both sides with PVC resin, which resists UV breakdown, stays flexible in cold weather, and holds a tighter weave that keeps wind-driven rain from misting through the fabric itself. That difference matters most on a roof, where the tarp sits exposed around the clock instead of being folded away after a weekend job.
Reading Tarp Weight and Thickness Ratings
Tarps are commonly sold by weight per square yard or by coating thickness, and heavier is not automatically better once wind resistance is considered. A mid-weight PVC-coated tarp in the 18 to 22 ounce range typically balances tear strength against manageable weight on a ladder, while very heavy tarps become difficult for one person to position accurately, especially in gusty conditions. Checking the grommet spacing is just as relevant as the weight rating, since closely spaced reinforced grommets give more anchor points along the perimeter for rope or additional fasteners.
Ladder Setup and Personal Safety Basics
The ladder should extend at least 3 feet above the roof edge, sit on firm and level ground, and be set at a stable angle where the base sits roughly one foot out from the wall for every four feet of height to the contact point. On steep or wet roofs, a roof anchor with a harness and rope grab is worth the setup time, since a slip on a wet slope during tarp placement is one of the most common causes of fall injuries during storm cleanup work.
Step-By-Step Tarping Process
- Clear debris first. Sweep off branches, granules, and loose shingle pieces so the tarp lies flat against the deck instead of tenting over sharp edges that can puncture it.
- Measure past the damage. Add a minimum 4-foot margin on all sides, and extend the tarp fully over the ridge if the leak sits within 6 feet of the peak.
- Fold the tarp on the ground first. Accordion-folding the tarp into a manageable bundle before carrying it up the ladder makes it far easier to control once you're on a sloped surface.
- Roll the tarp out and unfold it slowly. Wind can catch a fully opened tarp and pull a person off balance, so unfold in sections while it's weighted at the top edge with a batten or heavy object.
- Sandwich the top edge between two battens. Place one board on top of the tarp and one underneath, then screw through both boards and the tarp into the roof deck along the ridge or the highest point of coverage.
- Pull the tarp taut downslope. Any slack becomes a pocket that collects standing water and flaps loose in wind, so tension the material before securing the lower edge.
- Batten both side edges. Repeat the same sandwich technique along the left and right borders, spacing screws every 12 to 18 inches.
- Check the bottom edge overlaps shingles, not the gutter. Water needs to drain over existing shingles below the tarp rather than getting funneled behind the fascia.
- Add mid-span battens on large tarps. A tarp wider than about 10 feet benefits from one or two additional horizontal battens across the middle to stop the center from ballooning in wind.
- Inspect from the ground. Walk the perimeter of the house and look up for any flapping corners, gaps, or spots where the tarp doesn't sit flush against the roof plane.
- Recheck after the first rainfall. The first real rain event after installation is the best test; go back up (once conditions are safe) and look for any pooling, sagging, or fresh interior dripping that points to a missed gap.
Adjusting the Approach for Different Roof Shapes
Gable Roofs
On a standard gable roof, the tarp usually needs to cross the ridge whenever the leak sits in the upper half of the slope, draping down evenly on both sides so wind can't lift one edge higher than the other.
Hip Roofs
Hip roofs slope on all four sides, which means a leak near a corner often needs a tarp shaped or folded to wrap around the hip line rather than lying flat in one direction. Extra battens along the diagonal hip seam help keep the tarp from lifting where the two slopes meet.
Roof Valleys
A leak in a valley, where two roof planes meet in a V shape, needs a tarp that spans both sides of the valley rather than sitting inside it. Water volume through valleys is higher than on flat roof sections, so the tarp's lower edge should extend well past the valley's endpoint to avoid funneling extra water under the cover.
Flat and Low-Slope Roofs
Flat roofs don't shed water the same way sloped roofs do, so a tarp here needs to be sloped intentionally, often by building a slight pitch with foam blocks or extra battens under one edge so water is directed toward an existing drain rather than pooling in the middle of the tarp itself.

Mistakes That Undo a Tarp Job Overnight
Nailing or Screwing Directly Through Bare Tarp Edges
A screw through unsupported fabric creates a stress point. Once wind pulls on the tarp, the material tears outward from that single hole and the whole edge lets go. The batten-sandwich method spreads the load across a wooden strip so no single fastener bears the full force.
Stopping Short of the Ridge
Water running down the opposite roof slope doesn't stop at the peak. It curls over the ridge cap and slides underneath a tarp that ends just below the top, soaking the exact area the tarp was meant to protect.
Using an Undersized Tarp
A tarp cut exactly to the size of the visible hole almost never covers the full extent of water intrusion, since moisture often travels sideways under shingles well beyond the obvious break. Oversizing the tarp costs little and prevents a second call-back.
Working Alone on a Wet Roof
Wet shingles and a wet tarp both lose traction fast. Having a second person hold the ladder and pass materials up reduces the number of trips across a slick surface and gives someone on the ground who can call for help if needed.
Leaving Slack Anywhere in the Tarp
Loose fabric flaps in wind, and repeated flapping fatigues the material at every fastening point far faster than a taut, motionless surface. A tarp that snaps loudly in a breeze is a tarp that's already working itself loose.
Ignoring the Direction of Water Flow at the Bottom Edge
If the lower edge of the tarp ends mid-slope instead of over existing shingles, water sheds off the tarp and runs directly onto exposed decking or underlayment instead of continuing its natural path toward the gutter.
Comparing Tarp Materials for Roof Coverage
Not every tarp on the market is built for the same job. The table below lines up the common options against how they actually behave once they're stretched across a damaged roof section for an extended period.
| Material | UV Resistance | Cold Flexibility | Typical Field Lifespan |
|---|---|---|---|
| Light poly tarp | Low | Stiffens and cracks | A few weeks |
| Canvas tarp | Moderate | Good, but absorbs water | Weeks to a couple months |
| PVC Tarpaulin Cover | High | Stays pliable in cold | Several months to a season or more |
| Vinyl-laminated poly | Moderate to high | Can delaminate at seams | A month or two |
The heavier coating on a PVC Tarpaulin Cover is what pushes its usable lifespan past lighter alternatives. Sun exposure breaks down plastic through a process called photodegradation, and a thicker resin layer simply gives the sun more material to work through before the tarp becomes brittle enough to crack.
Grommets, Seams, and Edge Reinforcement
Beyond the base material, the way a tarp is finished around its perimeter affects how well it holds up under fastening and wind load. Look for double-stitched or heat-welded hems, rust-resistant metal grommets set every few feet, and reinforced corner patches, since corners take the most repeated stress from flapping and rope tension.
Weather and Seasonal Considerations
Tarping in Wind
Wind is the single biggest reason a roof tarp fails before its material even ages. Add extra battens along any edge facing the prevailing wind direction, and consider running a rope or strap from the tarp's grommets down to secured anchor points at ground level on especially exposed roof faces.
Tarping in Cold Weather
Cheaper plastic sheeting turns stiff and brittle once temperatures drop, and folding or stretching it in that state causes cracks along the fold lines. This is one of the clearest advantages a PVC Tarpaulin Cover holds over basic polyethylene sheeting, since the PVC coating keeps flexing without splitting even when the mercury drops well below freezing.
Tarping During Active Rain
Working during active rainfall raises the fall risk substantially. Where conditions allow, wait for a break in the weather, and if the interior damage is severe enough that waiting isn't an option, prioritize a smaller interior tarp or plastic sheeting inside the attic to redirect dripping water into a bucket until the roof itself can be safely accessed.
Summer Heat and Prolonged Sun Exposure
Extended heat accelerates the breakdown of most plastics, and dark-colored tarps absorb more heat than lighter ones, sometimes reaching surface temperatures well above the surrounding air on a sunny day. Choosing a lighter-colored PVC-coated tarp for a repair expected to sit through a full summer helps slow this thermal aging process.
Snow Load Considerations
A tarp left in place through snowfall needs to shed weight the same way a roof does. Steeper installation angles help snow slide rather than accumulate, and periodic snow removal with a soft roof rake keeps excess weight from stressing the batten fasteners or pulling the tarp loose at the edges.

Managing Interior Damage While the Tarp Is Up
A tarp addresses the roof exterior, but water that has already entered the attic or ceiling before the cover went on needs separate attention. Standing water sitting on drywall or insulation continues causing damage even after the source is sealed off.
Immediate Interior Steps
- Place buckets or containers under active drips and empty them regularly
- Move furniture, electronics, and belongings away from the affected area
- Poke a small drainage hole in a sagging, water-filled ceiling bubble to release pressure in a controlled way, directing the water into a bucket
- Run fans or open windows where safe to encourage airflow and reduce lingering dampness
- Photograph the damage before cleanup begins for insurance documentation purposes
Watching for Delayed Signs of Moisture
Some water damage doesn't show up right away. A musty odor developing over the days following a leak, discoloration spreading slowly across a ceiling, or paint beginning to bubble are all signs that moisture is still present somewhere in the structure even after the visible drip has stopped.
Checking On a Tarp Over Time
A tarp installed correctly still needs periodic attention, especially the longer it stays up while permanent repairs are scheduled. A short check every few weeks catches small problems before they turn into a repeat leak.
What To Look For During a Routine Check
- Loose or backed-out screws along the battens
- Pooled water sitting on the tarp surface instead of draining off
- Sun-bleached or brittle patches, especially along the highest, most exposed edge
- Debris buildup that adds weight or traps moisture against the surface
- Any fresh interior dripping following the last rain event
Removing and Storing a Tarp for Reuse
Once permanent repairs are complete, remove the battens first, then fold the tarp loosely rather than rolling it tightly while still damp, since trapped moisture inside a tight roll encourages mildew. Let it dry fully in a shaded area before folding it into long-term storage, ideally away from direct sunlight and away from anything sharp that could puncture the coating while stored.
When To Handle It Yourself and When To Call a Roofer
A single-story roof with a shallow pitch and a clearly visible damaged area is a reasonable DIY project for someone comfortable on a ladder. Steep pitches above roughly 6:12, multi-story homes, roofs with structural sagging, or any situation involving downed power lines nearby all call for a professional roofing crew instead.
Signs the Damage Goes Beyond a Simple Tarp Job
- Visible sagging or soft spots in the roof deck when walked on
- A hole large enough that the underlying decking is exposed across a wide span
- Damage affecting a chimney, skylight, or any structural penetration point
- Multiple separate leak locations across the same roof
Tarping is always a temporary measure. Even a well-installed PVC Tarpaulin Cover is meant to buy time until permanent shingle, membrane, or decking repairs can be scheduled, not to serve as a long-term roofing solution on its own.
Frequently Asked Questions
How long can a tarp stay on a roof?
A quality PVC Tarpaulin Cover installed correctly can hold up for several months, and in some cases through an entire season, before the material shows meaningful wear from sun and wind. Lighter poly tarps rarely last more than a few weeks in the same conditions.
Do I need to remove damaged shingles before tarping?
No. Loose granules and debris should be swept away, but damaged shingles generally stay in place under the tarp until a roofer handles the permanent repair. Removing shingles beforehand can widen the exposed area and create a bigger opening for water to enter.
Can I tarp a roof by myself?
It's possible on a low, shallow-pitched roof, but a second person on the ground or holding the ladder significantly reduces the risk involved. Steep roofs, wet conditions, or roofs above one story are better handled with at least two people or a professional crew.
What size tarp do I need for a roof leak?
Measure the damaged section, then add at least 4 feet of margin on every side. For leaks near the roof peak, choose a tarp long enough to fully cross the ridge and extend down the opposite slope.
Why does my tarp keep blowing off in wind?
This almost always comes down to fasteners going straight through unsupported tarp material instead of through a wooden batten. Sandwiching every edge between two boards and screwing through both spreads the load and stops wind from tearing a single fastening point loose.
Is a PVC Tarpaulin Cover reusable?
Yes, provided it's removed carefully and stored dry. Because the PVC coating resists cracking and mildew better than uncoated poly sheeting, a cover in good condition after one job can typically be folded, stored, and used again for a future emergency or job site cover.
Can a tarp stop a roof leak completely?
A properly installed tarp stops the great majority of active water intrusion, but it's a stopgap rather than a repair. Small amounts of moisture can still work through fastener points or wind-lifted corners over time, which is why tarps are meant to bridge the gap until permanent repairs happen.
What color tarp works best for a roof?
Color has little effect on waterproofing, but silver or white surfaces reflect more heat and slow down UV degradation compared to darker colors, which absorb more heat and can accelerate material breakdown over long installations.
How do I know if my tarp is installed correctly?
A correctly installed tarp lies flat with no loose flapping sections, drains water off the lower edge onto existing shingles, and shows no gaps at the batten seams. Checking again after the first heavy rain is the most reliable way to confirm the installation is holding.
Should I use rope in addition to battens?
On roofs exposed to strong or consistent wind, running rope through the grommets down to secure ground-level anchor points adds a second layer of hold beyond the battens alone, particularly along the tarp's leading edge facing the prevailing wind direction.
Can I tarp over a skylight or chimney?
A tarp can be draped around a skylight or chimney base, but the irregular shape usually needs extra folding and additional battens to seal tightly around the penetration point. These areas often benefit from professional flashing repair rather than a long-term tarp solution.
How soon after a storm should a roof be tarped?
As soon as it's safe to do so. Waiting through additional rain events after visible damage appears allows more water to penetrate the structure, so tarping promptly once wind and lightning risk have passed limits the total amount of secondary damage.
What's the difference between a tarp and a roof membrane?
A tarp is a temporary, removable cover meant to protect a damaged section until repairs happen, while a roof membrane is a permanent waterproofing layer installed as part of the actual roofing system. A PVC Tarpaulin Cover shares some material properties with PVC roofing membranes, but it isn't designed or fastened as a permanent surface.
Will homeowners insurance cover the cost of a tarp?
Many policies treat emergency tarping as a reasonable mitigation cost following storm damage, though coverage details vary by provider and policy. Keeping receipts, photos of the damage, and notes on when the tarp was installed helps support a claim if one is filed later.
 Previous


